iSite PACS 3.6 Education
Innovative image and
information management system
Philips iSite PACS 3.6 education provides quick tips to compliment powerful enhanced clinical workflow training.
The free resources on this page will help you get started using your iSite PACS 3.6 software. Visit this page often to view additional basic and advanced software trainings as they become available. This material is not intended to substitute or replace the Operating Manual or Instructions for Use.
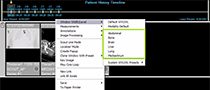
iSite PACS 3.6 Education Resources - Quick Tips
Dr. Linda shows Dr. Ben how to compare a reconstruct on the current study with a reconstruct from a prior study.

Do you have a case you want to share in a unique way with another clinician, student, or radiologists?

Dr. Ben show us to create plugins directly in the application, which is convenient if you have to access different websites.

Dr. Linda shows us how to create a System Hanging Protocol Sequence.

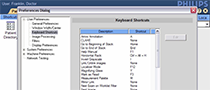
Dr. Ben shows us how to improve your workflow by using keyboard shortcuts.

Dr. Linda shows us how to create merge views in Volume Vision.

Join our Radiologist, Dr. Linda, as she saves some images from iSite PACS for a presentation for an upcoming conference.
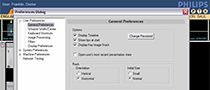
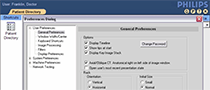
Dr. Linda shows us a few simple preferences to help us in our day-to-day work.
iSite PACS 3.6 Enterprise Education Resources - Overview
Add real time vizualization tools to iSite PACS: multi plane reformation (MPR), maximum intensity projection (MIP), create 3D objects...
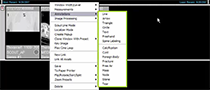
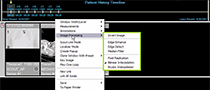
Mark annotations on the image with these set of tools: Line, Arrow, triangle, Circle, text, freehand or Spine labeling.
When using iSite PACS for teaching or demonstrations, we can use folders to anonymize all data inside these folders at once.
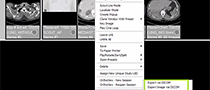
The export tool allows you to export exams (if preferred anonymously) as DICOM to another device such as a DICOM printer, 3D imaging tool or 3rd party archive.
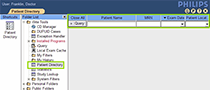
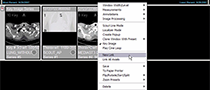
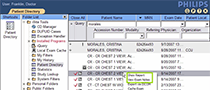
The Patient Directory query options allows you to search a patient for example by name, MRN, exam date or location.
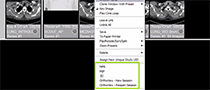
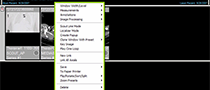
Use the context menu Flip/Rotate/Sort/Split for image orientation and sorting options.
Use the folder feature to prepare your images for later use directly from the canvas page or in the iSite startup window.
You can synchronize images or a series for panning and scrolling from the image context menu: New Link or Link all Axials.
Introduction to iSite Enterprise, a web based solution that is used by referring physicians, nurses, surgeons and technologists.

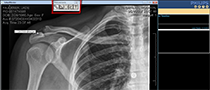
Key images are used as reference images. The ability to mark images as notable images in a large study is called marking Key Images.
Measurement tools are available from the context menu: Ruler, Angle, Region of Interest, Freehand ROI, Point Value, Measurement Palette, Calibrate Image.
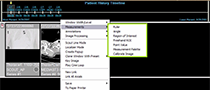
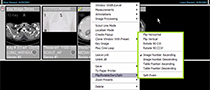
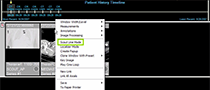
When you have a conference, surgery or teaching session you need to prepare images. iSite has a large set of tools you can use to prepare images for further review.
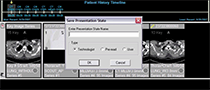
After using iSite toolset to prepare images you need to save these changes in a presentation state with a descriptive name.
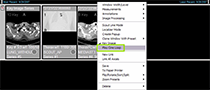
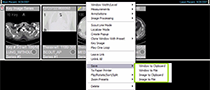
When you need to copy an image to be used in for example a presentation, you can use the Save option.
Scout Lines can be placed as a reference line and Localizer Mode as a crosshair reference on an image to navigate to the same location.
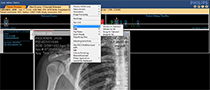
In this movie, the buttons under the Philips Logo are explained: Preference Menu, User Manual and logout.
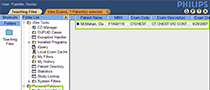
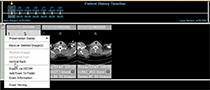
You can view reports, exam notes and images directly from the patient Directory.
For optimal viewing you may select the window width/level for optional viewing or to highlight a specific tissue for better visibility.
iSite PACS 3.6 Enterprise Education Resources - User Preferences
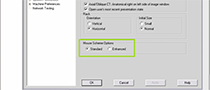
Change mouse functions using Mouse Scheme Options under General Preferences in the User Preferences section.
Learn to customize your user environment such as create notifications and improve workflow.
Create more room on your display, change display orientation, or modify the size of the images displayed by adjusting the Rack settings.
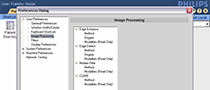
Overview of the Image Processing settings under User Preferences using to change the image processing tools.
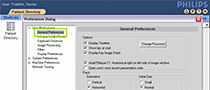
Introduction to the User Preferences that allow the user to configure the iSite enterprise system to specific needs, creating a customized viewing experience.
Create a custom window that uses specific window width and center settings.